Friday, February 01, 2008

Panel Headboard and Nightstands


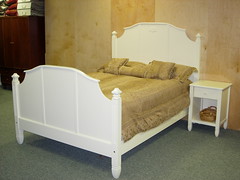
This is a custom headboard and couple nightstands that were built for the same customer as the “Wardrobe/Entertainment Center”. It was designed to match in style and color.

Headboard
The headboard was built with raised panels to match the style of the Wardrobe/Entertainment Center doors. I added some custom dental molding under the top lip. This is the same dental molding that I built to insert into the crown molding in the rest of the room.

Nightstand
On this nightstand, we deviated from the normal wood top, to a top that was made from Formica Solid Surface material. It gave the top had a granite look. We also used Formica laminate on a pull out drink tray above the drawers. Each of the drawers used full extension rails with birch drawer boxes. The base molding was a two piece molding, a solid square stock with a base cap on that. This matched the molding that I applied to the Wardrobe/Entertainment Center, with the exception that it was a little smaller.

The Wardrobe, nightstands, and headboard was one of the larger projects that I’ve completed on one order. I did separate it into two phases, which were separated by a week. This was to allow for carpet installation and I gave me a little breathing room.

Thursday, January 31, 2008

Wardrobe/Entertainment Wall


This is a wall unit completed on December 21, 2007. It is part of a complete bedroom set that I built for this customer consisting of this wall, a bed, and two end tables. I will write about the rest at a later date.

Features
46” flat panel television and accessories in center section
Television pulls out and swivels.
4 Hanging compartments for clothes. (one has a tie rack)
18 drawers (plus 2 hidden) all with full extension rails
20 solid raised panel doors with 170 degree cancelled hinges.
Wainscot panel style end panel
Built as a built-in with a corner block to transition from our crown to their crown.
All insides are natural maple with the outsides dyed, stained, and lacquer.
Television compartment is painted black.
This was a very large project for me, especially around Christmas time. I divided these units into 5 section and then each of the sections were built as a lower drawer section and then an upper doors section. Because I used full overlay hinges on the sections, it made everything look seamless. Also to make it look like one piece I added the left wainscot panel with the left style attached after everything else was in place. Another way I tried to make it look like one piece was I seamed the crown and base together as one piece before I applied the finish to them. I left them long and fit them on site.
I made a bed and end tables about a week later to match, so keep watching for later post. More picture can be viewed at our archives at my website www.wwbeds.com

Friday, August 24, 2007

Parks Canopy

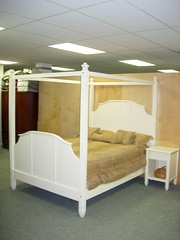
This is a bed that can be used as either a canopy bed or a standard four-poster bed. This was done by adding post extension and a canopy to the top. I made the top caps on the band saw with a coupled routed squares on the bottom. The wood of choice was both Popular and Maple.
FeaturesQueen Size convertible canopyHigh Gloss Lacquer finishFluted PostDoweled side rail connections with draw type bolts.Laminated top arch molding

This project was the first one that I used a brand new tool. It is a doweling jig from Dowelmax. The is a great tool and wished I bought one earlier. I used it everywhere. On the post/panel joint, to align and connect the lower post to the upper post and the upper post to the finale.

It also allowed me to make a much stronger side rail connection. I used three holes in each end of the side rail. Two for dowels and the center one for a machine screw. The machine screw connected to a half moon connecter that was set in a 1” hole. With the Dowelmax, I was able to perfectly align everything.

The top arch was laminated into that shape. Since I don’t have a vacuum system, I did it a little different technique. I cut the top cap into 6 1/8” strips. Put glued between each layer. Tacked it down in the center, onto the headboard (I didn’t glue the bottom layer to the headboard. I then clamped them all together with as many clamps that I had. Once it dried, I removed it and trimmed all sides. Added an edge profile and put it back on, this time with glue.

The bottom of the post was cut on the band saw and then all the post were clamped together and the coves were cut at the same time. The post were rotated 90 degrees and cut again. This was continued until all the side were hit.

Dowelmax made this project a lot easier. They are located in Canada and I believe they will send a free DVD. I would recomend this to anyone.

For more picture check out my “Current Projects” link at wwbeds.com.

Parks Four Poster

Saturday, June 23, 2007

Gone Live


Over the years I've been keeping my customers informed on what I've been working on by my "Current Projects" page. I post picture there and then give a little description of what I'm doing. That is if I had the time. Sometimes I would go a few days without posting any pictures, but would always catch up.

I have always wanted to show a live video of the shop, but didn't think that was possible. Until now. I've found a way to get our security camera onto our site. This is great because I can first, give my customers something fun to do.... See if you can find you furniture. It's a "Where's Waldo" type of thing. It also allows me to monitor the activity when I'm in the office or my day off. And especially it allows me to prove that I really get to work at 6:00, sometimes earlier. I'll have to move my nap time from the work bench to somewhere off camera. Not to mention removing the sawdust from my head (if you know what I mean).


It may not be the most beneficial thing, but you have to admit. It is really cool. Maybe the customers can't make out if I'm working on their furniture or something else. Even when I upgrade the camera. I'll try to keep note on the page and I'll keep up the photos. Speaking of photos did you see my new helper.
I plan on upgrading the camera system. I am using a wireless system now, which has a lot of interference. I'd like to hard wire the camera and add good quality audio. Now that would be a show. We have our own word to songs and our own dance moves too.
Let me know how you like it. Is this something that only I'm excited about? I'd like to know so send me some feedback.

Saturday, January 20, 2007

Special Edition


I just finished building another Special Edition baseball bed. This was a fun bed to build. It was ordered for a professional baseball player for the Angels, Kelvim Escobar. His designer placed the original order and Kelvim filled in the stats with his information and faxed the forms back to us.

This bed is based on our Special Edition version with a few modifications. For one, this will be the first one that we put both drawer and trundle under the bed. We also stained the wood a Special Walnut color from Minwax. Staining the headboard, I think, works out better than painting the letter black. We may make this the new standard.

The desk was a nice addition to the group. I did a distressing technique on the top. I first used a white undercoater to give it a white base; then I used a special walnut glaze to antique it a little. I did a little simulated worn look on the corners to make it look well used.

Friday, January 12, 2007

End of year

Wow, it has been along time since I've posted anything. Business has been very busy. Let me give a quick update on how our Murphy bed line is going. We have finished out the 2006 with 52 murphy beds being sold and built, which was our exact goal (1 per week). That is not bad for a small 2 man shop considering all the other items we still offer and build. Next years goal will be 60 murphy beds or 5 per week. That may be too conservative considering the new purchases I've made which has increased production.

My new baby is an edgebander that I've recently bought from Laguna Tools. I took a trip to Atlanta to visit the IWF2006 show for this specific purpose. This has been the largest purchase we've had to make so far in our 27 years in business, even bigger than our wide belt sander. But it has proved itself to be worth it. It is a BIG time saver. What would normally take 2 hours, now takes just 15 minutes. In our business time is money.

With that time savings I was able to keep the prices low. If you remember from an earlier post, my strategy was to artificially keep the prices low to increase interest and to get more web traffic. This has worked, but instead of raising the prices up to where the should have been (pre banding machine era) I can keep it level and save the customers a little.

I did make a small change in pricing. I raised the base price of all the sizes to cover packaging. This was not really a price increase. I just moved it form one place to another. I was figuring it into the shipping cost before. Now I've lower the shipping price to $299. So it is really a wash.

Don't forget to visit our web site at www.wwbeds.com, and our kids website www.poggyskids.com. I do have a new site where I'll focus on just the Murphy beds. That will be www.murphyswall.com.

I've had some interest in our beds from a sales rep., so we've sent a couple up to the furniture market in tupelo Mississippi. I'll post how that goes at a later time. So keep
Wow, it has been along time since I've posted anything. Business has been very busy. Let me give a quick update on how our Murphy bed line is going. We have finished out the 2006 with 52 murphy beds being sold and built, which was our exact goal (1 per week). That is not bad for a small 2 man shop considering all the other items we still offer and build. Next years goal will be 60 murphy beds or 5 per week. That may be too conservative considering the new purchases I've made which has increased production.

My new baby is an edgebander that I've recently bought from Laguna Tools. I took a trip to Atlanta to visit the IWF2006 show for this specific purpose. This has been the largest purchase we've had to make so far in our 27 years in business, even bigger than our wide belt sander. But it has proved itself to be worth it. It is a BIG time saver. What would normally take 2 hours, now takes just 15 minutes. In our business time is money.

With that time savings I was able to keep the prices low. If you remember from an earlier post, my strategy was to artificially keep the prices low to increase interest and to get more web traffic. This has worked, but instead of raising the prices up to where the should have been (pre banding machine era) I can keep it level and save the customers a little.

I did make a small change in pricing. I raised the base price of all the sizes to cover packaging. This was not really a price increase. I just moved it form one place to another. I was figuring it into the shipping cost before. Now I've lower the shipping price to $299. So it is really a wash.

Don't forget to visit our web site at www.wwbeds.com, and our kids website www.poggyskids.com. I do have a new site where I'll focus on just the Murphy beds. That will be www.murphyswall.com.

I've had some interest in our beds from a sales rep., so we've sent a couple up to the furniture market in tupelo Mississippi. I'll post how that goes at a later time. So keep