Wednesday, December 31, 2008

Baseball Loft


This was a project that we finished and delivered on Christmas eve. It is a baseball loft. It is based off my baseball bed that I normally build with the customizable headboard. This is real similar to the baseball loft I built last August. Here are some of the changes I made to this one.
I use the style slide that I have for my Castle Loft. The customer wanted a full size coming straight out on the bottom and the larger slide helped filling in that gap. I like how small the other slide was, but like the sturdiness of this one.

I incorporated the ladder into the side panels. I love this change. The less pieces the easer it will be to ship and assemble. I also looks better and reduces the weight of the panels.
I also didn’t do the dugout bench or wall this time. The customer wanted a full size bed under there instead.

The front guard rail was made form real Louisville Slugger bats. I slightly trimmed both ends of a pair and cut most of the handle off the other two to make is the correct size that I needed. I put them together with a lag dowel type screw. After getting it together It felt a little week at the joint so I made the center support by drilling two 1” holes in a piece of ash, taking the bats apart and sliding it in the middle.

I really like this bed and may try to build one for my showroom and internet. I wasn’t able to get real good pictures, so I’ll have to build another one.

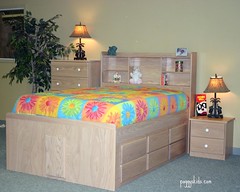
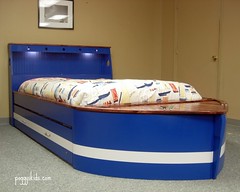
This is a picture of the old style:
Baseball loft bed

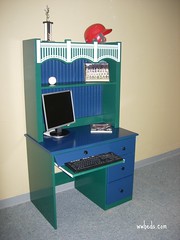
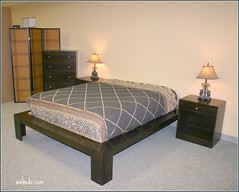
Here are some building pictures:
Baseball loft ready to paint
Baseball loft guard rail


For more building pictures see my Current Projects link at wwbeds.com or poggyskids.com. See what we are doing live: Check out the video live from our shop. http://wwbeds.com/


Saturday, November 29, 2008

Mission Style Wall Bed


This is a mission style Murphy wall bed that was completed on October 18th. The customer requested only one bookcase to accompany bed. It is one of my favorite Murphy beds but not to build. There are many parts that make up the face compared to some of the others that I build.

The wood is Red Oak with a Red Oak stain from Minwax. I then clear coat it with 2 coats of pre-catalyzed lacquer by Sherwin Williams.

The mission style crown I make myself and is set at a 45 degree angle. I start with 3 ½” wide board and cut the two back angles. I don’t take it down to a point. I leave a little material to ride against the fence on the subsequent cuts, since I have a right tilt table saw. After both back angles are cut, I flip the board over, adjust the fence and cut the face side slightly. This gives the crown another shadow line so that it looks like it is no just a flat board up there. Since they are cut at 45, they will be 90 degrees to the backs and therefore to the piece when it is mounted. I thought I’d share that with you. Hope you find it useful. I also used the same mission crown on the feet of Chandlers Table.

More pictures can be viewed in the October archives or the Current Projects link.

More pictures
mission murphy wall

As always you can see us live
goto http://www.ustream.tv/channel/wwbeds-shop

Thursday, October 30, 2008

Oak Captain's Bed

This is an oak captain’s bed that was completed on October 25, 2008. It features 6 drawers on one side and I just left the other side open. Most of the time these are placed in smaller kids rooms and usually the bed is placed against the wall making the other side useless. The footboard has a door has a door to access the space under the bed.

The finish that the customer selected was pickled oak from Minwax followed by two coats for pre-catalyzed lacquer.

More picture can be seen at www.wwbeds.com. Just click on Current Projects.

Monday, October 27, 2008

Chalkboard Murphy Wall Bed


This is a different version of my Chalkboard Murphy Wall bed that was completed on 9-30-2008. On this version the customer requested that we do pegboard on one side and the chalkboard on the other. All other wood surfaces were finished in a cherry finish.

Here are some other pictures

http://wwbeds.com/Sept08Pictures/DSCN5510.JPG

http://wwbeds.com/Sept08Pictures/IM003798.JPG

More pictures can be found on our Current Project page at www.wwbeds.com where we also have Live Video of our shop.

Monday, October 20, 2008

Chandler Table

This was a table that was complete on September 16th, 2008. It is a table base for a local designer. I was commissioned to build the base only and they supplied the glass top. It is built from walnut and Waterfall Bubinga. The walnut feet are 6×6x6 blocks mitered in the corner so that no end grain is showing. They were offset from the walnut base by 3” on each side. Then to make the transition from the feet to the base I used a mission style molding to match the top molding.

The bubinga used on the top a some that my brother bought at auction from Dessault/Falcon Jet where he works. I applied it to an MDF substrate with contact cement.

On the finish, I planned on doing everything natural, but the walnut wasn’t dark or consistent enough so I stained it with a Dark Walnut stain from Minwax before applying the two coats of pre-catalyzed lacquer. The top was clear coated only. By the way I just installed and used my new air assisted airless spray gun that I bought at the IWF show last month. It is great. It applies the softest finish with very little overspray.

This was actually my second one to build. The first one I looked at my cut list wrong and built it too wide by 8 inches. The customer said they would take both and sell the other on consignment for me, so it worked out great. The pictures below are of the wider one

More Picture

Sample of Waterfall Bubinga
Before the table base was stained
View without glass top


Friday, August 15, 2008

Yankee Baseball Desk Open

This is a desk competed on August 12, 2008. It was custom built for a customer who also bought our Baseball Murphy Bed Locker. The goal was to incorporate the look of the old Yankee stadium. I had some pictures and what I did was to match the top to the Yankee façade.

This desk features a single pedestal with drawers and a pull out keyboard tray. I tried something different on my keyboard tray this time. I had the false drawer front pull up and the tray slide out from underneath.

It was finished it in my standard baseball blue and green lacquers. All the case was green and the drawer fronts, writing surface and back were blue.

Wednesday, August 06, 2008

The Rains Platform Bed

This is a platform bed that was completed on July 16, 2008. The wood that was used for this project is maple and is finished in a cappuccino finish. This is a platform style bed and only mattress, no foundation, will be used. For this reason the slats are constructed with just a couple inches of space between them. The slats also have a slot that they are inserted into to keep the spacing uniform and easy to install.

I also built case goods to match (dresser, night sands, and chest). They are built in a simple contemporary style with slab drawer fronts and squared off edges.

To see more like this visit our web site wwbeds.com. We are now a live view of our shop. Just visit our "Current Projects" page.

Saturday, June 14, 2008

Excalibur June09

This is a Murphy bed that was completed on 06-13-2008. It is made from maple wood and finished out using a dye stain and a regular wiping stain. The fleur-de-lis carving at the top was chosen by the customer as was the handles. See more like this at: http://wwbeds.com/Excalibur.htm

Saturday, May 24, 2008

A Pair of Chalkboards Beds

This is a set of beds that were competed on 5-18-2008 shown here with the beds closed. They are built for two boys that shared the same room. These Murphy beds are built with a chalkboard and pegboard front and the beds are separated by a 24” bookcase with drawer and shelves behind a door. A drink try has also been added between the door and the drawers.

This is basically a Murphy bed with a flat face, which I call the Alpine. I painted the lower section with a chalkboard paint that can be purchased at any home store. On the upper section I used contact cement to attach a roll of pegboard material and then built a frame around that. I also added a chalk tray which I milled out of solid maple with a fluting bit.

Thursday, May 22, 2008

Cherry Finish Excalibur

This is a Murphy bed that was completed on 5-9-2008. I call it the Excalibur. This bed has arched raised panels on the face along with fluting on the trim beside the doors. Above the fluting is the release leg that unlocks if from the cabinet and acts at the support feet when the bed is in the down position. Above the feet are rosettes that were cut in.

To tie it in to the customers existing furniture I matched the color and changed the crown up a little. The customer had some dental molding that they wanted to match. To get this to work I had to deviate from my standard cut list and make a taller header and sides. The dental molding wraps around and I needed to figure a break that would allow it to disassemble and reassemble to where the molding looked seamless.

The color is a dye stain followed by a wiping stain. The dye is a combination of brown and red dyes with a lot of thinner and the stain coat is Red Mahoney from Minwax. The cherry colors was matched off a customers drawer.
Here are some links to the building pictures
You can see more at our "Current Projects" page.

Friday, April 18, 2008

Full Boat


Full Boat
Originally uploaded by cdavis9699@sbcglobal.net
This is a boat bed that was completed on 4-15-2008. It is one my production bed that I build regularly. I’ve built this one in just about every size but king. Going from toddler to queen size. I even sent one to Qutar in the Middle East. I’ll be building two more in the next few weeks. One pink and one this same color.

I change something on this bed each time I build it. This time around I made the headboard legs removable. I used dowels and pocket screws for it to be reassembled. I also added air vents in the back, for safety reasons. The last few have had an air space under the lid, but to streamline production and to improve the appearance, I move them to the back.

Thursday, February 07, 2008

Special Edition Baseball bed


This is a version of our popular Baseball bed that I completed on 2-6-2008. I’ve built many of these. This one, however, is a little different than our norm. It comes from our Special Edition line and I customized it a little more then normal.

On this bed, like our other baseball beds, the child get to help us customize the headboard. They fill out a form with the team names, the score, the stadium name, and their name. Usually I use authentic Louisville Slugger Signature bats, but this time the customer chose one of Louisville’s Pro Stock series called Hornsby. This is the same grade bat that the professionals use.

I then matched the wood type, which is Ash. The color was a little tricky. Ash stains out like oak. It’s easy to get the dark grain but the rest of the wood would be light. We ended up dying the wood with a brown dye and then stained it using a tweaked version of Minwax’s Red Mahogany.

All the information that the customer sent to us I had routed into the wood, but only after the finish was applied. This exposed the natural wood and made the cut sections lighter. The original plan was to paint the letters and numbers gold to match the bats, but after it was cut and loved the result of the natural ash, we decided that the gold would just cheapen the look of the bed.

This bed has a trundle and drawers under the bed and a matching nightstand.

Wednesday, February 06, 2008

Murphy bed Sideways Ross


This is a Murphy bed that was completed on January 26, 2008. This is a style that I build often, but this is the first sideways version. It is built in oak with 2 24” bookcases. Most of the time I keep the two sides symmetrical. This customer chose to have two different style bookcase.
See more at our website: www.wwbeds.com

Monday, February 04, 2008

Combination Loft


This is a loft that I completed on 1/24/2008. It is made from all pine and includes a desk, bookcase, chest and trundle. It also has a pass through on the back side that can be used for storage or a “club house”.

One of the large end panels I did something different. I didn’t want to use solid pine because it needed strength and I didn’t think the solid would hold up and that would have been a lot of gluing. If I used a plywood, I’d have to edge band or add trim along the edge. The edge band would be too square and the molding would have alter the design the customer saw on my original. What I did was to use a MDF core pine panel. I cut the end panels, like normal, rounded it over with a router and after it was stained and finished , the edge looked great. I got the idea from a door I saw on some cabinets a while back.

Friday, February 01, 2008

Panel Headboard and Nightstands


This is a custom headboard and couple nightstands that were built for the same customer as the “Wardrobe/Entertainment Center”. It was designed to match in style and color.

Headboard
The headboard was built with raised panels to match the style of the Wardrobe/Entertainment Center doors. I added some custom dental molding under the top lip. This is the same dental molding that I built to insert into the crown molding in the rest of the room.

Nightstand
On this nightstand, we deviated from the normal wood top, to a top that was made from Formica Solid Surface material. It gave the top had a granite look. We also used Formica laminate on a pull out drink tray above the drawers. Each of the drawers used full extension rails with birch drawer boxes. The base molding was a two piece molding, a solid square stock with a base cap on that. This matched the molding that I applied to the Wardrobe/Entertainment Center, with the exception that it was a little smaller.

The Wardrobe, nightstands, and headboard was one of the larger projects that I’ve completed on one order. I did separate it into two phases, which were separated by a week. This was to allow for carpet installation and I gave me a little breathing room.

Thursday, January 31, 2008

Wardrobe/Entertainment Wall


This is a wall unit completed on December 21, 2007. It is part of a complete bedroom set that I built for this customer consisting of this wall, a bed, and two end tables. I will write about the rest at a later date.

Features
46” flat panel television and accessories in center section
Television pulls out and swivels.
4 Hanging compartments for clothes. (one has a tie rack)
18 drawers (plus 2 hidden) all with full extension rails
20 solid raised panel doors with 170 degree cancelled hinges.
Wainscot panel style end panel
Built as a built-in with a corner block to transition from our crown to their crown.
All insides are natural maple with the outsides dyed, stained, and lacquer.
Television compartment is painted black.
This was a very large project for me, especially around Christmas time. I divided these units into 5 section and then each of the sections were built as a lower drawer section and then an upper doors section. Because I used full overlay hinges on the sections, it made everything look seamless. Also to make it look like one piece I added the left wainscot panel with the left style attached after everything else was in place. Another way I tried to make it look like one piece was I seamed the crown and base together as one piece before I applied the finish to them. I left them long and fit them on site.
I made a bed and end tables about a week later to match, so keep watching for later post. More picture can be viewed at our archives at my website www.wwbeds.com